Dagger 2 for Android, Part IV ー The @Scope Annotation
In this article, I will talk about how to use the @Scope annotation.

This is part of my Dagger 2 blog series:
- Dagger 2 for Android, Part I ー What is Dependency Injection?
- Dagger 2 for Android, Part II ー The Basic Usage
-
Dagger 2 for Android, Part III ー The @Qualifier and @Named Annotation
- Dagger 2 for Android, Part IV ー The @Scope Annotation (you are here!) - Dagger 2 for Android, Part V ー @Inject for Constructor Injection
- Dagger 2 for Android, Part VI ー @Component.Builder and @BindsInstance
The code example used in this article will be written in Kotlin for Android development.
Pre-requiresite: Understanding basic usage of Dagger 2: @Inject, Provides, @Module, and @Component. Read Part I, II above if you haven't 😀 👆
Why we need @Scope?
Recap of the basic usage
For Dagger dependency injection, we have a Component, which includes some Modules. The modules prepare some dependencies with @Provide. So whenever we try to ask for a dependency with @Inject, Dagger will make a new instance and provide it to us.
I won't go into details in this section since it is assumed this part is covered in more detail in Part I, II & III. So this is only a quick recap! 👇
Let's take a look at this basic usage:
- Component
@Component(modules = [AnimalModule::class])
interface AppComponent {
    fun inject(activity: ScopeActivity)
}- Module
@Module
class AnimalModule {
    @Provides
    fun provideSnoopy(): Dog = Dog("Snoopy")
}- Dog
data class Dog(val name: String)- Usage in Activity
class ScopeActivity : AppCompatActivity() {

    @Inject
    lateinit var snoopy1: Dog

    @Inject
    lateinit var snoopy2: Dog

    override fun onCreate(savedInstanceState: Bundle?) {
        super.onCreate(savedInstanceState)
        setContentView(R.layout.activity_scope)
        DaggerAppComponent.builder().build().inject(this)
        dogTextView1.text = "injected: ${snoopy1.name}"
        dogTextView2.text = "injected: ${snoopy2.name}"
    }
}
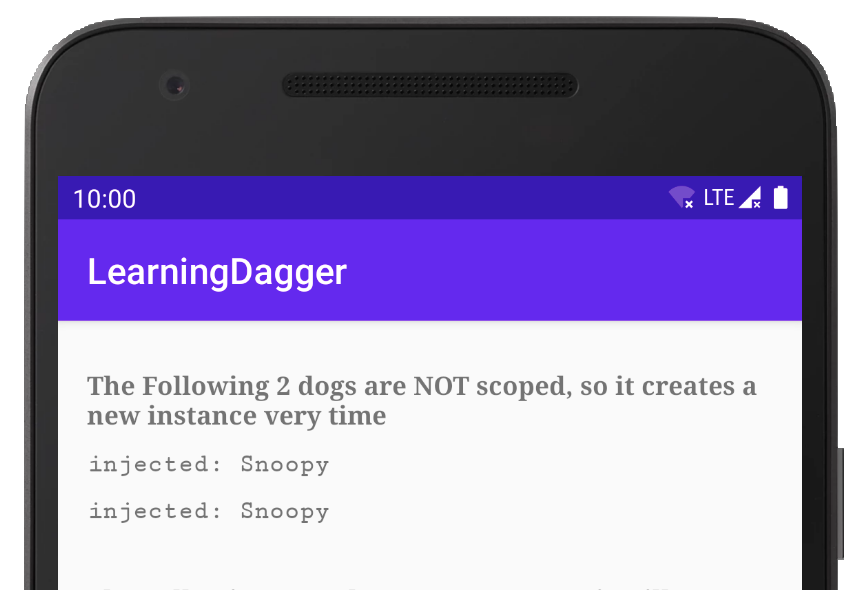
This will produce the following:

Dagger makes new instance for 'unscoped' dependency
Noticed that there are 2 usages of @Inject above. While snoopy1 and snoopy2 look almost identical. However, they are actually a different instance.
Let's make some changes so that we can see the difference 👀.
By adding dogCount, we can see that even they have the same name, the 2 snoopies are actually a different instance.
- data class Dog(val name: String)
+ data class Dog(val name: String, val count: Int)
class MainApplication : Application() {
...
+ companion object {
+ var dogCount = 0
+ }
}@Module
class AnimalModule {
@Provides
- fun provideSnoopy(): Dog = Dog("Snoopy")
+ fun provideSnoopy(): Dog = Dog("Snoopy", dogCount++)
}We increase dogCount everytime a Dog is instantiated. 👆
class ScopeActivity : AppCompatActivity() {
    // ... omitted
    override fun onCreate(savedInstanceState: Bundle?) {
        // ... omitted
-        dogTextView1.text = "injected: ${snoopy1.name}"
-        dogTextView2.text = "injected: ${snoopy2.name}"
+        dogTextView1.text = "injected: ${snoopy1}"
+        dogTextView2.text = "injected: ${snoopy2}"
    }
}
I removed .name, so that kotlin data class will print all it's value. 👆
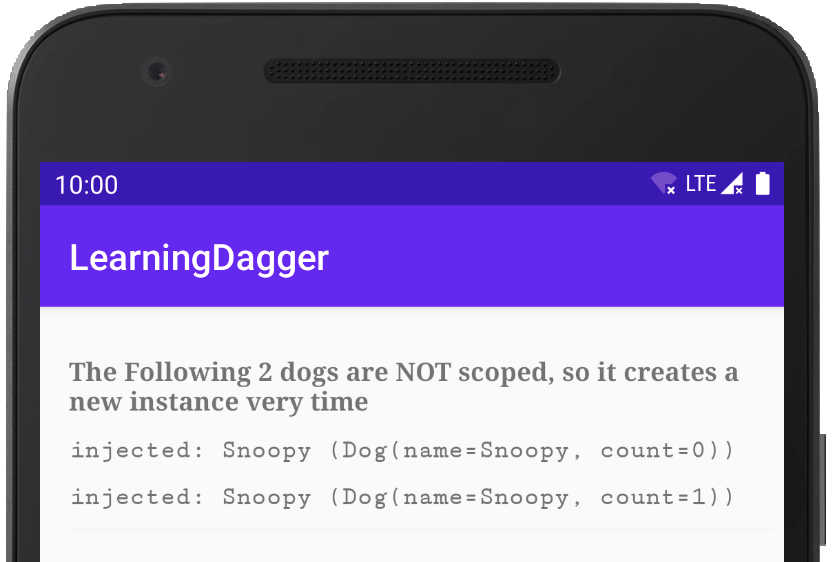
This will produce:

Notice that the first snoopy has count = 0 and the second one has count = 1.
This is because they are NOT scoped. So everytime we asked for the dependency using @Inject, it will produce a new instance as described in AnimalModule's @Provide.
@Scope to the rescue!
In order to re-use the same instance, we can use @Scope annotation!
Let's continue with our example, we will add a new dependency called Turtle:
data class Turtle(val name: String, val count: Int)We will then make Turtle to have become a 'scoped' dependency, and Dog will remain to be a 'non-scoped' one.
There are 3 places we need to make addition for scope to work.
-
ApplicationScope.kt
Add the scope itself in a new file:
import javax.inject.Scope

@Scope
@Retention(AnnotationRetention.RUNTIME)
annotation class ApplicationScope
This file is to create a new scope using the @Scope annotation. The name of the class can be anything. You can even rename ApplicationScope to become ASDFScope and it will still work.
Optional reading
As you might have noticed,@Scopeis define byjavax.injectpackage. So you cannot change this word.javax.injectis a standard, Dagger is a library implementing this standard.
https://github.com/javax-inject/javax-inject,
- Component
After adding a new scope ApplicationScope, this scope by itself doesn't do anything, because we haven't told Dagger about it.
So let's tell Dagger abou tit here in our AppComponent file.
@Component(modules = [AnimalModule::class])
+@ApplicationScope
interface AppComponent {
    fun inject(activity: ScopeActivity)
}
By adding this line here, we are telling Dagger that AppComponent has ApplicationScope. So whenever we use @Provides annotation in any Modules under AppComponent, we can add @ApplicationScope to make Dagger give us the same instance of dependency.
- Module
So here, let's see it in action, we will addprovideTurtle()along with@ApplicationScope.
@Module
class AnimalModule {
    @Provides
    fun provideSnoopy(): Dog = Dog("Snoopy")

+    @Provides
+    @ApplicationScope
+    fun provideTurtle(): Turtle = Turtle("Master Oogway", turtleCount++)
}
Noticed that provideTurtle() has the same @ApplicationScope as the AppComponent. When we request for a dependency from the same AppComponent which has the same scope, we will obtain the exact same instance!
- Finally, add 2 turtles in the
ScopeActivity:
class ScopeActivity : AppCompatActivity() {
    // ... omitted
+   @Inject
+   lateinit var turtle1: Turtle
+   @Inject
+   lateinit var turtle2: Turtle
    override fun onCreate(savedInstanceState: Bundle?) {
        // ... omitted
        dogTextView1.text = "injected: ${snoopy1}"
        dogTextView2.text = "injected: ${snoopy2}"
+       turtleTextView1.text = "injected: ${turtle1}"
+       turtleTextView2.text = "injected: ${turtle2}"
    }
}
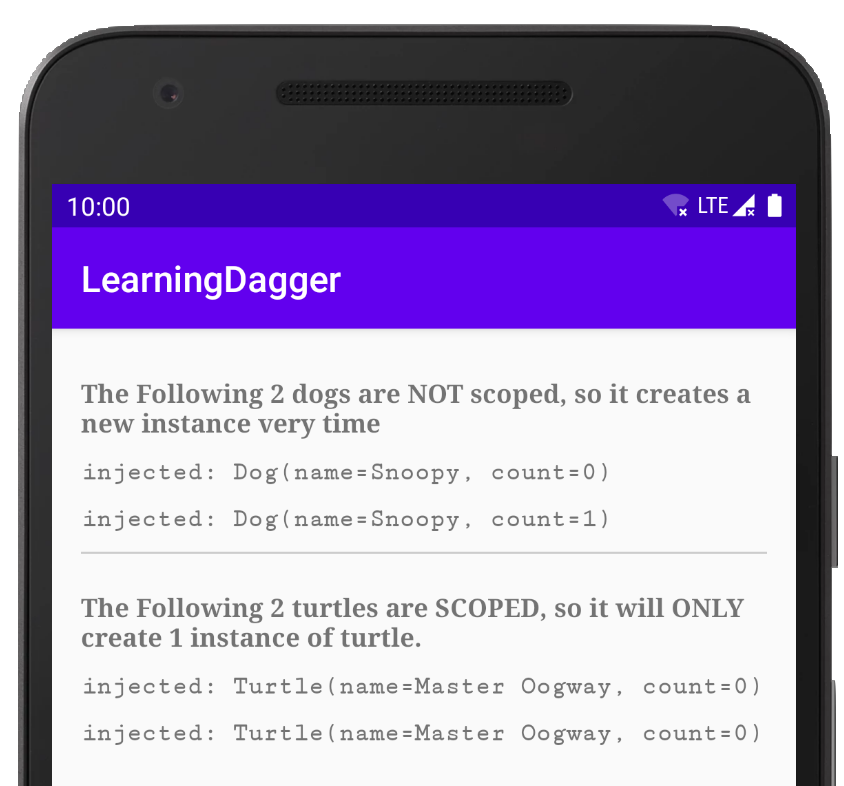
You'll see this:

Noticed that the count of the 2 turtles both have count = 0, they are the same instance! We have successfully created a scope! 🎉
@Singleton
In this post, we have created a scope called ApplicationScope. However there is a default scope called @Singleton that has already been defined in javax.inject. If you need to make a Singleton in your code, you can simple reuse @Singleton. Remember that @Singleton has nothing special or different from the @ApplicationScope we just defined, it is simply another class annotated with @Scope!
Here's the source code, which is the same as ApplicationScope:
(it looks a little different from our ApplicationScope just simply because it's written in Java):
/**
 * Identifies a type that the injector only instantiates once. Not inherited.
 *
 * @see javax.inject.Scope @Scope
 */
@Scope
@Documented
@Retention(RUNTIME)
public @interface Singleton {}
When to use scope?
When to use scope will depends on your needs. If you need only 1 instance, or if you need to make a new one everytime.
For example, the network client retrofit, it makes sense to use the same instance so that they share the same caching, so we can use the @Singleton scope. Another example of @Singleton is the database, because we only need the same instance.
As for a non-singleton example, let's say we want to log the time a user spend on each page. So we created a class called class TimerLogger. For this class, it should NOT be a singleton, otherwise the TimeLogger for our 'HomePage' might log 30 seconds. When a user visits the 'SearchPage', Dagger will give us the SAME TimerLogger, and the loggin will start from 30 seconds, which is wrong! So in this case, we will use an unscoped one to obtain a new instance every time.
Subcomponent & more fine-tuned scopes
You might wonder if it's possible to create a more fine-tuned scopes. The answer is yes! Since scope is tied to a component, we will need to create subcomponent in order to have a more fine-tuned scope. That will be covered in a future blog post!
Closing
It's been a while since I wrote the last time. Dagger Part III was written more than 1 year ago. Finally got myself back to writing.
Let me know if you have any questions or if you found that I have mistakes in my post. 🌻
Thanks for reading!
📚📚📚
Tan Jun Rong
Clap to support the author, help others find it, and make your opinion count.